

How to Package Dart for Use as a Native iOS Library
How to Package Dart for Use as a Native iOS Library
We eliminate the Flutter Plugin, move the corresponding native code to a dedicated project, and create a Swift Package bypassing the dependence on local Flutter SDK installation.

In a previous post, we described how to use Flutter to make a Dart library accessible from iOS native code. Now we want to take that library and redistribute it as a native library for iOS apps. Sounds simple, but things can get tricky.
The typical approach for iOS library distribution is CocoaPods. This is the recommended option when adding Flutter to existing native code, as described in Flutter’s docs. In this case, the flutter_module is compiled from the source each time the app is built.
Although the most straightforward way to do it, it is not a great option for library distribution because each library user will need to learn and set up the Flutter SDK. Plus, all of your build pipelines will also need the Flutter SDK.
As discussed here, we chose to distribute the TIKI SDK by eliminating the Flutter Plugin and moving the corresponding native code to their respective projects. For iOS, we create a Swift Package because it supports binaries dependencies, bypassing the dependence on local Flutter SDK installation. After all, the Flutter Module already compiles as an XCFramework.
Create iOS Binaries
Flutter includes a command to create the XCFrameworks for a Flutter Module:
flutter build ios-framework --output=relative/destination/pathThis command will create 3 directories in the relative/destination/path that will hold the Flutter binaries for each build type: Release, Debug, and Profile. If no output is provided, it will generate the frameworks in build/ios/framework/ directory. If the objective is to just distribute for production, the Debug and Profile modes can be skipped.
flutter build ios-framework --output=relative/destination/path --no-profile --no-debugIf you run this command in a Flutter Module without any plugin dependencies, it will generate 2 directories containing the XCFrameworks:
App.xcframework —the compiled Flutter Module
Flutter.xcframework - the compiled Flutter engine
For projects that have plugins, it generates a FlutterPluginRegistrant.xcframework, which is responsible for instantiating the various Platform Channels, and a PluginName.xcframework for each plugin, containing the plugin source.
Prepare Binaries for Distribution
Now that we have the iOS binaries, we need to package them for distribution. First, we compress the binaries as a zip file and upload them to a server where they can be downloaded via HTTPS. It can be done with traditional upload to any server or even using a Git repository for that. The latter is not recommended because it requires further configuration for large files. Some frameworks, like Flutter.xcframework, can exceed 100MB.
For the TIKI SDK distribution, we use GitHub Release Artifacts. Each new version of the TIKI SDK Flutter triggers a GitHub Action that builds the XCFrameworks and uploads it to the release page. It is an easy setup with GitHub Actions, and it simplifies version control.
Once the binaries are uploaded, a SHA256 checksum for the files needs to be generated. This is a security step to ensure that the file that downloaded from the server is the same as the implementer intended. Swift Package Manager has a built-in command to generate the checksum. This command is intended to be run at the root of the Swift Package. Apple documentation is not clear about why this is necessary —if you run the command elsewhere, it will print the checksum but finish with an error that may break your CI/CD pipeline. To avoid the error, we use the following command, replacing <xcframework.zip> with the lib name:
shasum -a 256 <xcframework>.zip | cut -f1 -d' 'Save each sha256 hash to be used later when adding to the Swift Package.
Create the Swift Package
To create a Swift Package, you need to:
Open Xcode
Go to File > New > Package
Give a name to your package and save
Import Binaries to Swift Package
Now that we have the binaries ready for distribution, we import them as dependencies for the Swift Package in Xcode.
Open the Package.swift file
In the Package targets attribute, add your dependencies in the .target with the library name. The dependencies should be the name of the file before the .xcframework. e.g., Flutter, App, FlutterPluginRegistrant, etc.
import PackageDescription

let package = Package(
    name: "MyLibrary",
    products: [
        .library(
            name: "MyLibrary",
            targets: ["MyLibrary"]),
    ],
    dependencies: [],
    targets: [
        .target(
            name: "MyLibrary",
            dependencies: [
                "App",
                "Flutter"
            ]),
        .testTarget(
            name: "MyLibraryTests",
            dependencies: ["MyLibrary"]),
    ]
)
Next, add a .binaryTarget attribute in the targets list for each XCFramework
targets: [
        .target(
            name: "MyLibrary",
            dependencies: [
                "App",
                "Flutter"
            ]),

                    .binaryTarget(
            name: "App",
            url: "https://github.com/<org>/<repo>/releases/download/<tag>/App.xcframework.zip",
            checksum: <checksum>
        ),
        .binaryTarget(
            name: "Flutter",
            url: "https://github.com/<org>/<repo>/releases/download/<tag>/App.xcframework.zip",
            checksum: <checksum>
        ),
…
Clean Project
Go to File > Packages > Reset Package Caches
Build Project
If the package resolution fails, you will not be able to build the project, and the Issue Navigator will not show any errors. To see what went wrong, go to the Report Navigator and check the package resolution errors. Once the errors are fixed, repeat steps 4 and 5 to make sure that you have the correct versions of the XCFrameworks. It is necessary to repeat 4 and 5 when you update dependencies in the Package file.
Add Native Swift Code
At this point, the Dart code is available through the XCFrameworks. The next step is to prepare the native code in the Swift Package to initialize the Flutter Engine. First, we add some code to create and handle the Flutter Method Channel.
public class MyLibraryFlutterChannel {

    let channelId = "my_library_channel"

    var flutterEngine: FlutterEngine
    public var methodChannel: FlutterMethodChannel

    public init() {
        flutterEngine = FlutterEngine(name: "my_library_engine")
        flutterEngine.run()
        GeneratedPluginRegistrant.register(with: flutterEngine);
        methodChannel = FlutterMethodChannel.init(name: channelId, binaryMessenger: flutterEngine as! FlutterBinaryMessenger)
        methodChannel.setMethodCallHandler(handle)
    }

    public func handle(call: FlutterMethodCall, result: @escaping FlutterResult) {
        ...
    }

}
In the root of the Package, we initialize the Method Channel and add our native dependencies.
public class MyLibrary{

    var myLibraryFlutterChannel: MyLibraryFlutterChannel
    var methodChannel: FlutterMethodChannel

    public init(origin: String, apiKey: String, onBuild: TikiSdkCompletion? = nil) {
        myLibraryFlutterChannel = MyLibraryFlutterChannel()
        methodChannel = myLibraryFlutterChannel.methodChannel
    }

    public func someMethod(){
        methodChannel.invokeMethod('someMethod')
    }
}
Distribute the Swift Package
The Swift Package is now ready for distribution. To distribute it, we need to push it to a public git repository. Any git repo works, but I recommend Github because of its integration with Xcode. Although not required, it is highly recommended to tag the repository with version numbers. Once the package is available in a git repository, it can be easily added to any iOS project with Xcode.
In the project Target, go to Package Dependencies
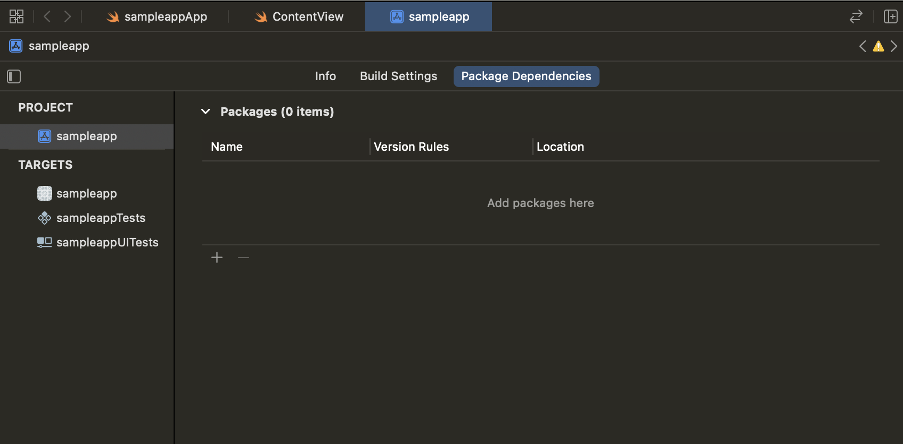
Click on the + sign
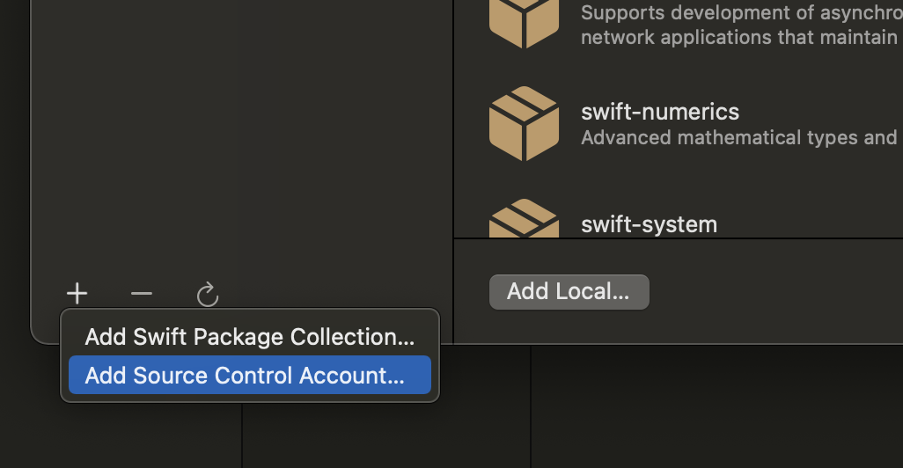
If your GitHub Account is not connected yet, click on the + sign in the bottom left corner and choose “Add source control account…”. Connect your GitHub account with a Personal Access Token.

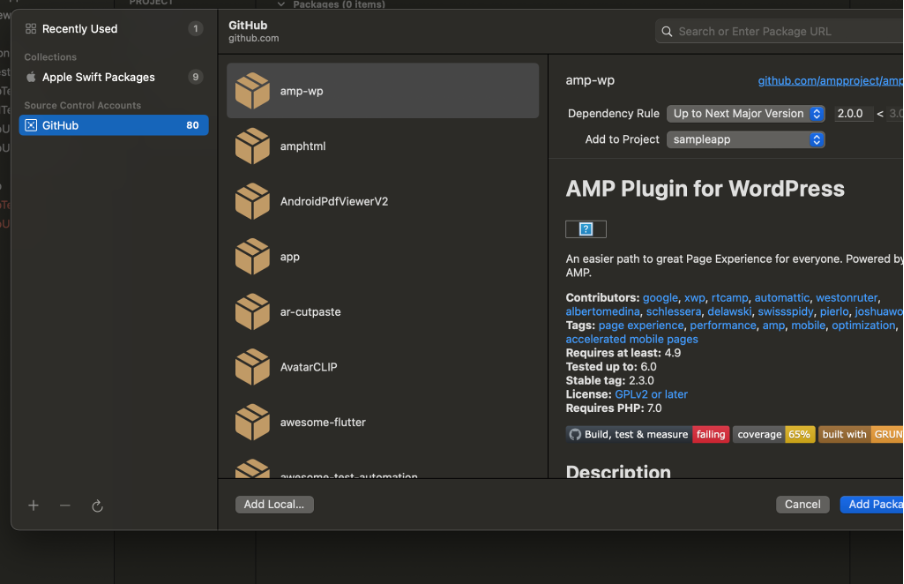
In the left panel, select your GitHub account.

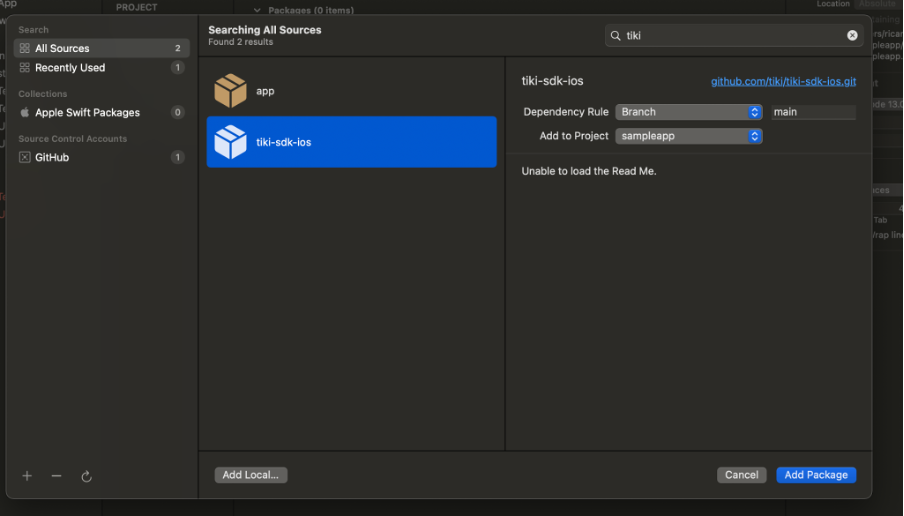
Choose the Package and click Add Package.


And that is it! Now you have a native iOS library built in Dart that you can distribute to developers. To see our project end-to-end, check out the following: tiki-sdk-dart, tiki-sdk-flutter, tiki-sdk-ios
 | A guest post by
|
Hi Ricardo, i create spm package for flutter frameworks to integrate in my iOS app as per your tutorial but i'm facing issue in it while running on actual device regarding 'Library not loaded @rpath/Flutter' but it works fine on simulators. I'm stuck on this for few days, seems like SPM doesn't support dynamic libraries. Have you faced any issue with SPM while running on actual devices